Posted in

අපේ රනවිරුවන් වෙනුවෙන් මෙය share කරන්න
මේ කතාව අපිට එව්ව Srishan Cool ට ගොඩක් ස්තුති..


 VIEW Cording

import java.awt.*;
class Cal extends Frame{
Cal(){
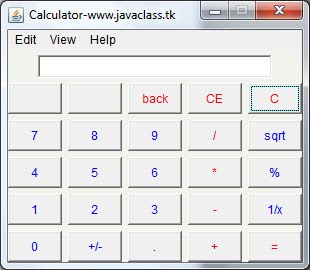
setTitle("Scientific Calculator");
setSize(500,230);
setResizable(false);
setBackground(new Color(194,217,241));
` BorderLayout bl=new BorderLayout();
Panel p1=new Panel();
Panel p2=new Panel();
Panel p3=new Panel();
Panel p4=new Panel();
add(p1,bl.SOUTH);
add(p2,bl.NORTH);
add(p3,bl.WEST);
add(p4,bl.EAST);
TextField tf=new TextField(50);
p2.add(tf);
GridLayout gl1=new GridLayout(5,10,6,6);
p1.setLayout(gl1);
GridLayout gl2=new GridLayout(1,3,8,8);
p3.setLayout(gl2);
GridLayout gl3=new GridLayout(1,5,6,6);
p4.setLayout(gl3);
//CREATE cHECKBOX
Checkbox c1=new Checkbox("Degrees",false);
p3.add(c1);
Checkbox c2=new Checkbox("Radians",false);
p3.add(c2);
Checkbox c3=new Checkbox("Grads",false);
p3.add(c3);
Button b0 = new Button (null);
p1.add(b0);
Button b1 = new Button ("Inv");
p1.add(b1);
Button b2 = new Button ("In");
p1.add(b2);
Button b3 = new Button ("(");
p1.add(b3);
Button b4 = new Button (")");
p1.add(b4);
Button b5 = new Button ("<--");
p1.add(b5);
Button b6 = new Button ("CE");
p1.add(b6);
Button b7 = new Button ("C");
p1.add(b7);
Button b8 = new Button ("+/-");
p1.add(b8);
Button b9 = new Button ("v");
p1.add(b9);
Button b10 = new Button ("Int");
p1.add(b10);
Button b11 = new Button ("sinh");
p1.add(b11);
Button b12 = new Button ("sin");
p1.add(b12);
Button b13 = new Button ("X2");
p1.add(b13);
Button b14 = new Button ("n!");
p1.add(b14);
Button b15 = new Button ("7");
p1.add(b15);
Button b16 = new Button ("8");
p1.add(b16);
Button b17 = new Button ("9");
p1.add(b17);
Button b18 = new Button ("/");
p1.add(b18);
Button b19 = new Button ("%");
p1.add(b19);
Button b20 = new Button ("dms");
p1.add(b20);
Button b21 = new Button ("cosh");
p1.add(b21);
Button b22 = new Button ("cos");
p1.add(b22);
Button b23 = new Button ("xY");
p1.add(b23);
Button b24 = new Button ("y_/X");
p1.add(b24);
Button b25 = new Button ("4");
p1.add(b25);
Button b26 = new Button ("5");
p1.add(b26);
Button b27 = new Button ("6");
p1.add(b27);
Button b28 = new Button ("*");
p1.add(b28);
Button b29 = new Button ("1/x");
p1.add(b29);
Button b30 = new Button ("Pi");
p1.add(b30);
Button b31 = new Button ("tanh");
p1.add(b31);
Button b32 = new Button ("tan");
p1.add(b32);
Button b33 = new Button ("x3");
p1.add(b33);
Button b34 = new Button ("3_/x");
p1.add(b34);
Button b35 = new Button ("1");
p1.add(b35);
Button b36 = new Button ("2");
p1.add(b36);
Button b37 = new Button ("3");
p1.add(b37);
Button b38 = new Button ("-");
p1.add(b38);
Button b39 = new Button ("=");
p1.add(b39);
Button b40 = new Button ("F-E");
p1.add(b40);
Button b41 = new Button ("Exp");
p1.add(b41);
Button b42 = new Button ("Mod");
p1.add(b42);
Button b43 = new Button ("log");
p1.add(b43);
Button b44 = new Button ("10x");
p1.add(b44);
Button b45 = new Button ("");
p1.add(b45);
Button b46 = new Button ("0");
p1.add(b46);
Button b47 = new Button (".");
p1.add(b47);
Button b48 = new Button ("+");
p1.add(b48);
Button b49 = new Button ("");
p1.add(b49);
Button b50 = new Button ("MC");
p4.add(b50);
Button b51 = new Button ("MR");
p4.add(b51);
Button b52 = new Button ("MS");
p4.add(b52);
Button b53 = new Button ("M+");
p4.add(b53);
Button b54 = new Button ("M-");
p4.add(b54);
//bUTTON COLOUR
b0.setBackground(new Color(235,242,252));
b1.setBackground(new Color(235,242,252));
b1.setForeground(Color.red);
b2.setBackground(new Color(235,242,252));
b2.setForeground(Color.RED);
b3.setBackground(new Color(235,242,252));
b3.setForeground(Color.RED);
b4.setBackground(new Color(235,242,252));
b4.setForeground(Color.RED);
b5.setBackground(new Color(235,242,252));
b6.setBackground(new Color(235,242,252));
b7.setBackground(new Color(235,242,252));
b8.setBackground(new Color(235,242,252));
b9.setBackground(new Color(235,242,252));
b10.setBackground(new Color(235,242,252));
b10.setForeground(Color.RED);
b11.setBackground(new Color(235,242,252));
b11.setForeground(Color.RED);
b12.setBackground(new Color(235,242,252));
b12.setForeground(Color.RED);
b13.setBackground(new Color(235,242,252));
b13.setForeground(Color.RED);
b14.setBackground(new Color(235,242,252));
b14.setForeground(Color.RED);
b15.setBackground(new Color(235,242,252));
b16.setBackground(new Color(235,242,252));
b17.setBackground(new Color(235,242,252));
b18.setBackground(new Color(235,242,252));
b19.setBackground(new Color(235,242,252));
b20.setBackground(new Color(235,242,252));
b20.setForeground(Color.RED);
b21.setBackground(new Color(235,242,252));
b21.setForeground(Color.RED);
b22.setBackground(new Color(235,242,252));
b22.setForeground(Color.RED);
b23.setBackground(new Color(235,242,252));
b23.setForeground(Color.RED);
b24.setBackground(new Color(235,242,252));
b24.setForeground(Color.RED);
b25.setBackground(new Color(235,242,252));
b26.setBackground(new Color(235,242,252));
b27.setBackground(new Color(235,242,252));
b28.setBackground(new Color(235,242,252));
b29.setBackground(new Color(235,242,252));
b30.setBackground(new Color(235,242,252));
b30.setForeground(Color.RED);
b31.setBackground(new Color(235,242,252));
b31.setForeground(Color.RED);
b32.setBackground(new Color(235,242,252));
b32.setForeground(Color.RED);
b33.setBackground(new Color(235,242,252));
b33.setForeground(Color.RED);
b34.setBackground(new Color(235,242,252));
b34.setForeground(Color.RED);
b35.setBackground(new Color(235,242,252));
b36.setBackground(new Color(235,242,252));
b37.setBackground(new Color(235,242,252));
b38.setBackground(new Color(235,242,252));
b39.setBackground(new Color(235,242,252));
b40.setBackground(new Color(235,242,252));
b40.setForeground(Color.RED);
b41.setBackground(new Color(235,242,252));
b41.setForeground(Color.RED);
b42.setBackground(new Color(235,242,252));
b42.setForeground(Color.RED);
b43.setBackground(new Color(235,242,252));
b43.setForeground(Color.RED);
b44.setBackground(new Color(235,242,252));
b44.setForeground(Color.RED);
b45.setBackground(new Color(235,242,252));
b46.setBackground(new Color(235,242,252));
b47.setBackground(new Color(235,242,252));
b48.setBackground(new Color(235,242,252));
b49.setBackground(new Color(235,242,252));
b50.setBackground(new Color(235,242,252));
b51.setBackground(new Color(235,242,252));
b52.setBackground(new Color(235,242,252));
b53.setBackground(new Color(235,242,252));
b54.setBackground(new Color(235,242,252));
}
}
class CreateCal{
public static void main(String args[]){
Cal c=new Cal();
c.setVisible(true);
}
}


while(condition){
//body of loop
}
 0 සිට 10000 දක්වා සංඛ්යා print විමට program 1ක් ලියමු..
class New{
public static void main(String args[]){
int A=0;

while(A<=10000){      System.out.println(A);      A++;       }      }  }
do{
//body of loop
}while(condition)
class New{
public static void main(String args[]){
int A=1;
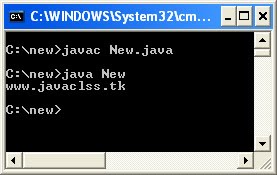
do{ System.out.println("www.javaclss.tk");
A++;
}while(A>=10);
}
}
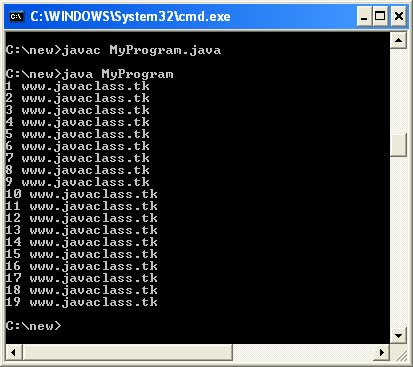
 ඉහත program එකේ condition එක true උනොත් loop එක දිගටම ක්රියත්මක විම සිදුවේ.එවිට program එක පහත ආකරයට run වේ.
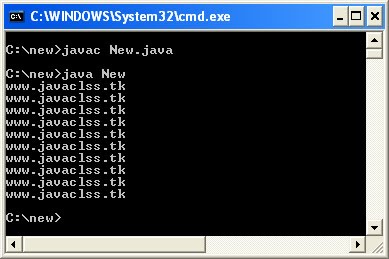 for Loop
for(initialization;condition;iteration){
  //body
  }


class New{
public static void main(String args[]){
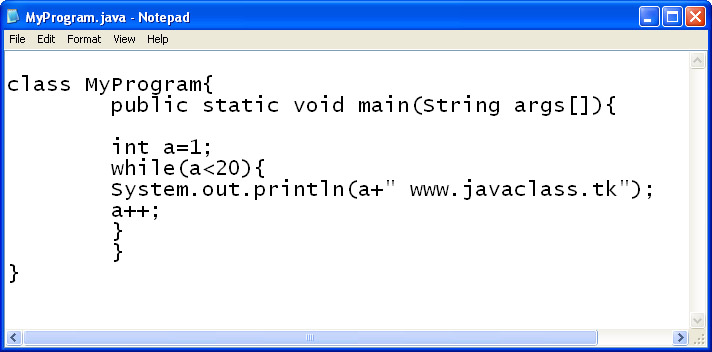
for(int A=1;A<=10;A++){ System.out.println(A+"www.javaclss.tk"); } } }


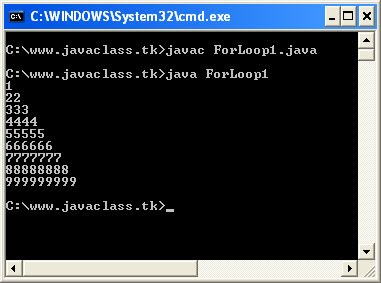
public class  ForLoop1{
public static void main(String[] args){
for(int i = 1;i <= 9;i++){       for(int j = 1;j <= i;j++){         System.out.print(i);       }       System.out.println();     }   } }
 Java Premitive data type හි data type 8 ක් අපි ඉගන ගන්නවා...
| Type | Contains | Default | Size | Range |
|
| true or false | false | 1 bit | NA |
|
| Unicode character unsigned | \u0000 | 16 bits or 2 bytes | 0 to 216-1 or \u0000 to \uFFFF |
|
| Signed integer | 0 | 8 bit or 1 byte | -27 to 27-1 or -128 to 127 |
|
| Signed integer | 0 | 16 bit or 2 bytes | -215 to 215-1 or -32768 to 32767 |
|
| Signed integer | 0 | 32 bit or 4 bytes | -231 to 231-1 or -2147483648 to 2147483647 |
|
| Signed integer | 0 | 64 bit or 8 bytes | -263 to 263-1 or -9223372036854775808 to 9223372036854775807 |
|
| IEEE 754 floating point single-precision | 0.0f | 32 bit or 4 bytes | �1.4E-45 to �3.4028235E+38 |
|
| IEEE 754 floating point double-precision | 0.0 | 64 bit or 8 bytes | �439E-324 to �1.7976931348623157E+308 |


class MyProgram2 {public static void main(String args[]){}
int x=75;
int y=80;
int z=90;
int total=x+y+z;
System.out.println("Total is = "+total);
}

මෙය Run කල පසු පහත ලෙස print වේ................class MyProgram2 {
public static void main(String args[]){
double x=75;
double y=80;
double z=90;
double avg=(x+y+z)/3;
System.out.println("Subjet 1 mark is= "+x);
System.out.println("Subjet 2 mark is= "+y);
System.out.println("Subjet 3 mark is= "+z);
System.out.println("Total is = "+avg);
}
}

class New{
public static void main(String args[]){
int A=10;
int B=20;
System.out.println("value of A is ="+A );
System.out.println("value of B is ="+B );
++A;//value 1කක අගය 1කින් ඉහල දැමිම
--B;//value 1කක අගය 1කින් පහල දැමිම
System.out.println("value of ++A is ="+A );
System.out.println("value of --B is ="+B);
}
}
මෙය Run කල පසු පහත ලෙස print වේ................
සිදු කරනා ගනිතකර්මය sop (System.out.println) 1ක තුලදී සිදුකල හැක. පහත උදාහරනය මගින් බලමු..class New{
public static void main(String args[]){
int A=10;
int B=20;
System.out.println("value of A is ="+A );
System.out.println("value of B is ="+B );
System.out.println("value of ++A is ="+(++A));
System.out.println("value of --B is ="+(--B));
}
}
මෙම පහත උදාහරනය බලන්න...class New{
public static void main(String args[]){
int A=10;
int B=20;
System.out.println("value of B is ="+B );
System.out.println("value of B++ is ="+B++);
System.out.println("value of B is ="+B );
}
}
මෙහිදී B සදහා අගයක් ආදේශ වනුයේ 2 වන SOP 1ක තුලදී වන අතර නමුත් ඒය 2වන Sop 1ක
තුලදී Print නොවේ ඒ යට හේතුව program 1ක් run වනුයේ වමේ සිට දකුනටය.B++ හිදී
B අගය 1කින් ඉහල දැමිමට සිදුවනුයේ;ලකුනෙන් පසුව වේ.ඒ නිසා next line 1කේ දී ඉහල දැමිමට
සිදුවු B print වේ.class MyProgram{
public static void main(String args[]){
int a=50;
int b=20;
System.out.println("Value of a = " + a );
System.out.println("Value of b = " + b );
System.out.println("a + b = " + String.valueOf(a+b) );
System.out.println("a - b = " + String.valueOf(a-b) );
System.out.println("a * b = " + String.valueOf(a*b) );
System.out.println("a / b = " + String.valueOf(a/b) );
System.out.println("a % b = " + String.valueOf(a%b) );
System.out.println("a ++ = " + String.valueOf(a++) );
System.out.println("Value of a = " + a );
System.out.println("b -- = " + String.valueOf(b--) );
System.out.println("Value of b = " + b );
}
}
Bitwise logical Operator
    if (condition) {
        // Task 1
        // Task 2
        // Task 3
        -----
 ----- }
class MyProgram{
    public static void main(String args[]){
    int a=50;

    if(a>=20){
     System.out.println("Value of a = " + a );
       }
     }
}

    if (condition) {
        // Task 1
        -----}
       else {
    // Task 2 }
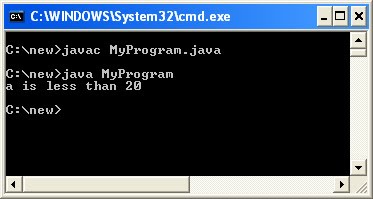
මෙහිදී a සදහා අගය 15 ක් අදේශ කර ඇත. ඒමනිසා (a>=20) condition 1ක අසත්ය වේ.ඒමනිසා else තුල ඇති statement 1ක print වේ..ඉහත program 1ක පහත පරිදි run වේ..class MyProgram{
public static void main(String args[]){
int a=15;
if(a>=20){
System.out.println("a is greater than 20 " );
}
else{ System.out.println("a is less than 20 " );
}
}
}
class MyProgram{
   public static void main(String args[]){

   double mark1=70;
   double mark2=58;
   double mark3=60;
   //calculate average
   double avg=(mark1+mark2+mark3)/3;

   System.out.println("Average Mark is ="+avg);

   //Grade "A,B,C,S,F" using if-else

   if(avg>=75){
   System.out.println("Your grade is = A ");
   }
   else if(avg>=65){
   System.out.println("Your grade is = B " );
   }
   else if(avg>=50){
   System.out.println("Your grade is = C " );
   }
   else if(avg>=35){
   System.out.println("Your grade is = S" );
   }
   else{
   System.out.println("Your grade is = F " );
   }
   }
}


ඉහත program 1ක පහත පරිදි run වේ.....
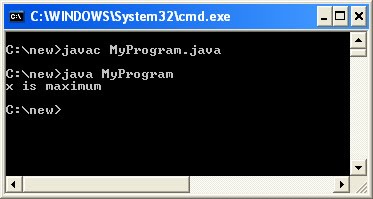
class MyProgram{
   public static void main(String args[]){
   int x=10;
   int y=4;
   int z=4;

   if(x>y){
         if(z>x){
               System.out.println("z is maximum");
                }
           else{
                System.out.println("x is maximum");
               }
          }
   else if(z>y){

           System.out.println("z is maximum");
           }
          else{
           System.out.println("y is maximum");
             }

      }

}


